It is safe to say that FromSoftware never ceases to amaze us with their new ideas for games, and when we think we saw everything from this amazing studio, they make something that gets even more impressive than we originally thought it would be.
Such is the case with Elden Ring: Nighreign, the latest action RPG that is designed to be played cooperatively, even though, in theory, it can be played solo, but once you try it, let's just say the experience won't be pleasant for you, to say the least.
Starting this game for the first time can be quite an overwhelming task and, in real FromSoft fashion, quite confusing, too. So if you cannot quite figure out what to do once the action actually starts, here are some tips and advice on how to do it properly.

Elden Ring: Nightreign—Beginner's tips and tricks
DAY 1
- As soon as you land, kill a couple of mobs and level up immediately. The second level doubles your stats. You'll know when you can level up when you spot an arrow beside your level in the upper left corner.
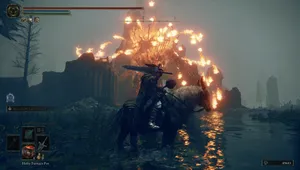
- It's time for your first boss. Find bosses at points of interest on the map like camps, ruins, mines and various buildings. Don't take on harder bosses (Tree Sentinel, Magma Wyrm, Dragons) on the first day; come back for them later when you're stronger.
- Bosses drop unique items and passive stats. Choose those based on your playstyle and class but, most importantly, the main boss you're going to fight. e.g., don't choose a magic damage boost passive skill if you're playing strictly melee, and make sure to pick items that deal damage that the boss is weak to, e.g holy, poison, lightning, etc.
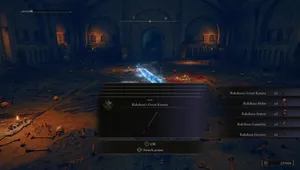
- After killing your first boss, it's time to head to the Marika Church and increase the charge of your flask. These will be visible on the map. You'll notice the ones you haven't visited by their golden colour.
- It's worth noting that you should always, always look to create a perfect path in which you can slay bosses and visit Marika churches in a timely manner. For example, don't go for a boss on one side of the map and then travel all the way to the other side to visit the church. Make sure to kill some bosses and do important stuff on the way there.
- After that, it's all rinse and repeat. Visit points of interest like castles, ruins and dungeons; kill the bosses for awesome drops; and level up and increase your flask charge.
- At the end of day one, you'll have to fight a boss, which should be easy to take down, even if you had a bad day one. Ideally, at the end of day one, you want to be around level eight. Six and seven are also fine for the first couple of main bosses.
DAY 2
- On day two, make sure you focus on taking on greater bosses. Don't waste your time on the easier bosses, as these won't give you enough XP to get to levels above 10 where we want to be for that main boss fight.
- You'll find greater bosses marked on the map with a dragon head-like icon which has red shadowing around it.
- Evergoals are another activity you can take on, but you can open these only if you have Stonesword keys.
- Ideally, you want to get your hands on a purple-tier weapon on day two. If the RNG Gods happen to mistreat you with poor loot, you can always upgrade your weapon to purple rarity by visiting a merchant in the world.
- To upgrade weapons, you'll need upgrade materials like Smithing Stones. These can be purchased from the merchants or found in the mines.
- Make sure to visit the central castle on day two if you didn't do that on day one. Not only will you find bosses on the top of the castle and in the dungeons below, but there's also a map in the room on the top that will unveil the locations of Scarabs, which drop talismans when killed.
- Speaking about talismans, there's one as soon as you exit the dungeon boss room in the castle and head up the stairs.
DAY 3
- Regarding Day 3, there's really not much to tell, only that the time pressure will be over once you defeat the final Day 2 boss.
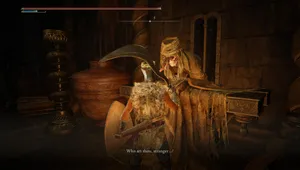
- Once this boss is dealt with, you will leave Limveld and arrive in a small sanctuary known as the Spirit Shelter. Here, you can level up, buy necessary equipment from the merchants, and upgrade your gear before you decide to go for the final encounter.
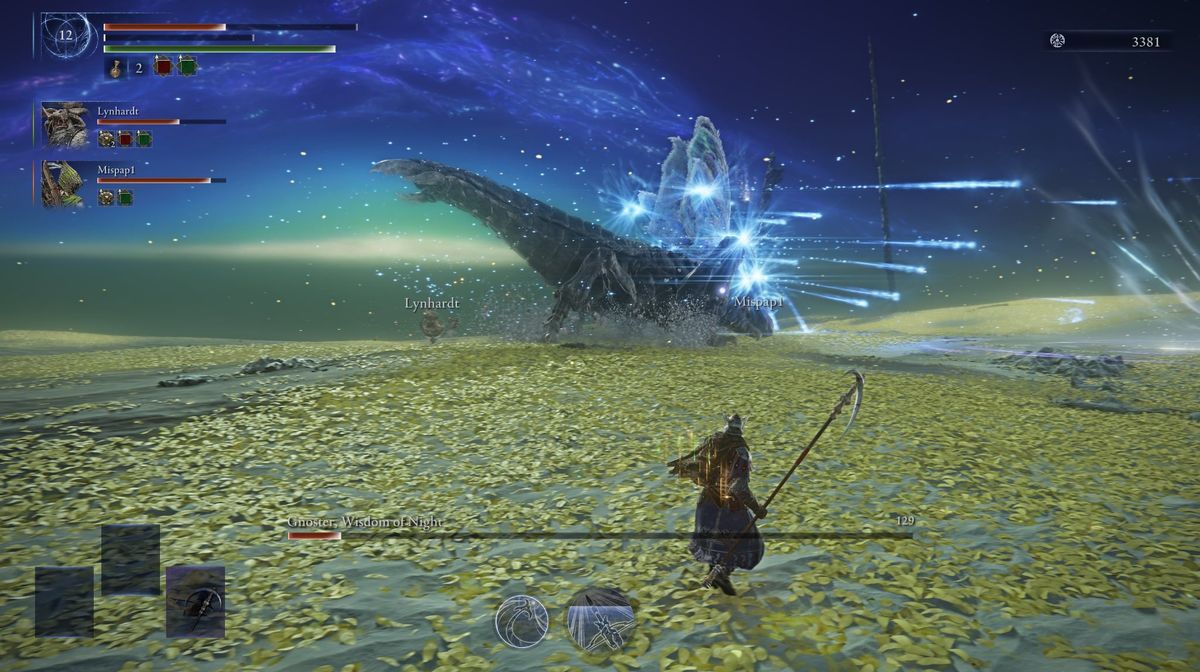
- Once the preparations are done, simply leave the shelter and follow the path to a great door. Go through the door, and you'll face the final battle against Nightlord.

DON'T MISS!