Trending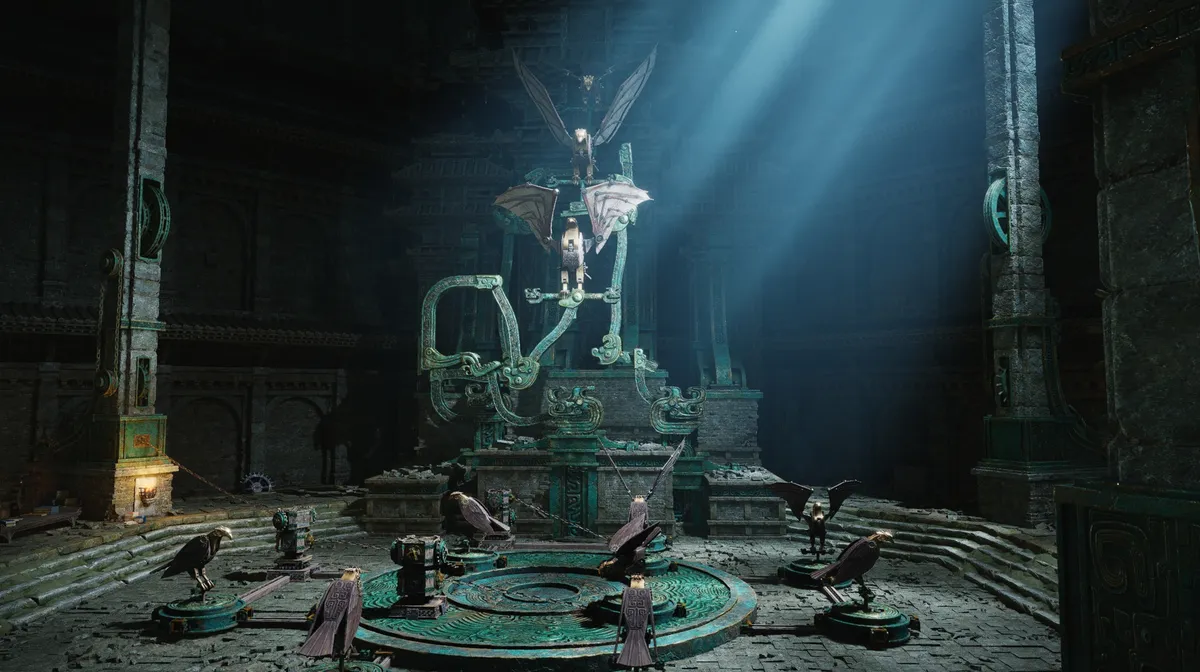
Hidden Mountain is the next big expansion for Where Winds Meet, going live for global players on July 23. At the centre of it all is the Mohist Hill Sect, the game's first sect built entirely around construction and mechanical engineering.
That engineering theme runs throughout the expansion, and nowhere is it more obvious than in the Ephemeral Glory Lost Chapter quest, where you'll solve a series of mechanical bird puzzles by linking chains between rotating mechanisms. This guide walks you through every puzzle you'll encounter in this quest.
Starting the Quest and the Core Puzzle Logic
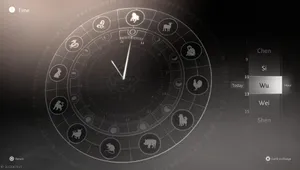
Head to the Ephemeral Glory starting point and wait until Chen Hour, then speak with Chen Shezhi to begin the quest. From there, cross the broken bridge ahead of you into the cave's interior chamber, investigate the clues inside, then follow the quest marker to a zipline and use it to reach the next area and your first bird puzzle.
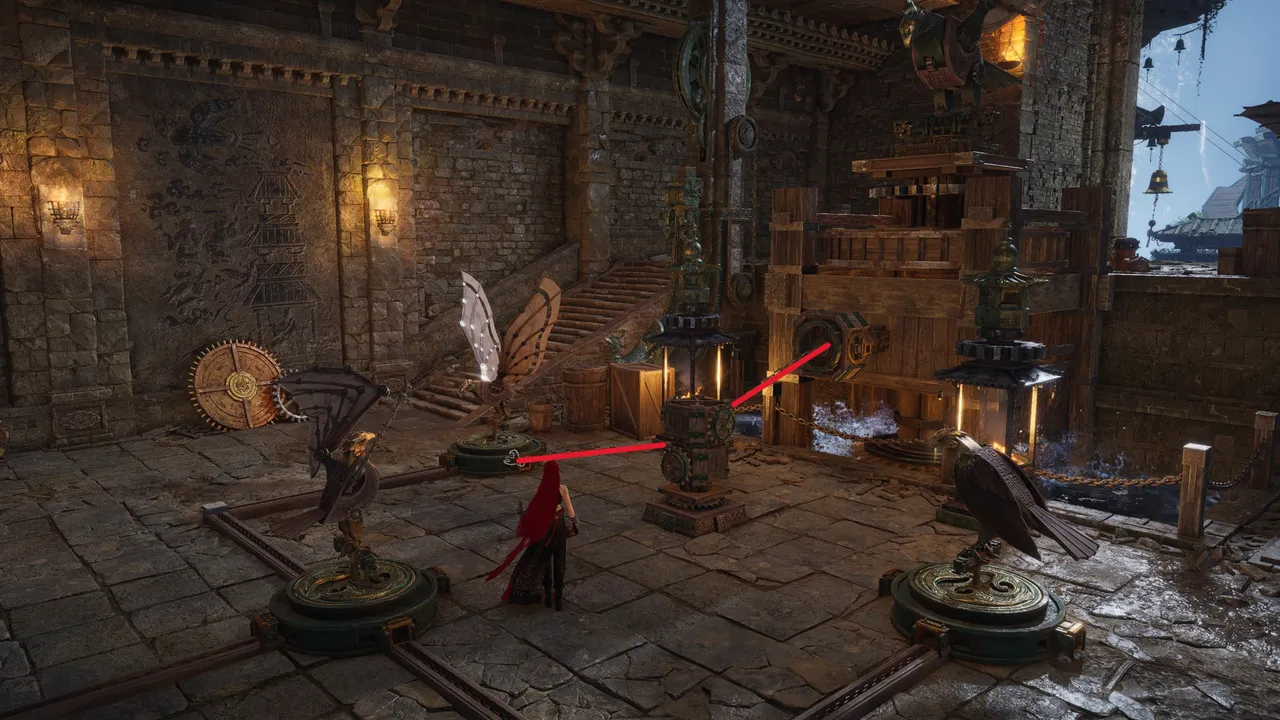
Every puzzle revolves around a chain mechanism - a small gear post with two chain hooks, one on each layer, and each puzzle room has one or more large "master" bird statues acting as your reference models that tell you which smaller birds ultimately need to be activated.
A chain mechanism needs to be powered before it can do anything. One of its two chains has to connect to a power source - this could be a waterwheel, an already-powered mechanism, or another mechanical bird. Once powered, the mechanism's second chain becomes active, and its second chain can be used to pass that power onwards.
Puzzle 1
This is the simplest of the four. Look at the large bird statue, find the smaller bird with the matching pose, then use Celestial Seize (F) to connect the chain mechanism to it. The door blocking your path will open, and you can continue forward.
Puzzle 2
Again, identify the shape of the large statues, then find the matching smaller birds. This time you need to connect the chain mechanisms so that the two smaller birds move in sync with one another.
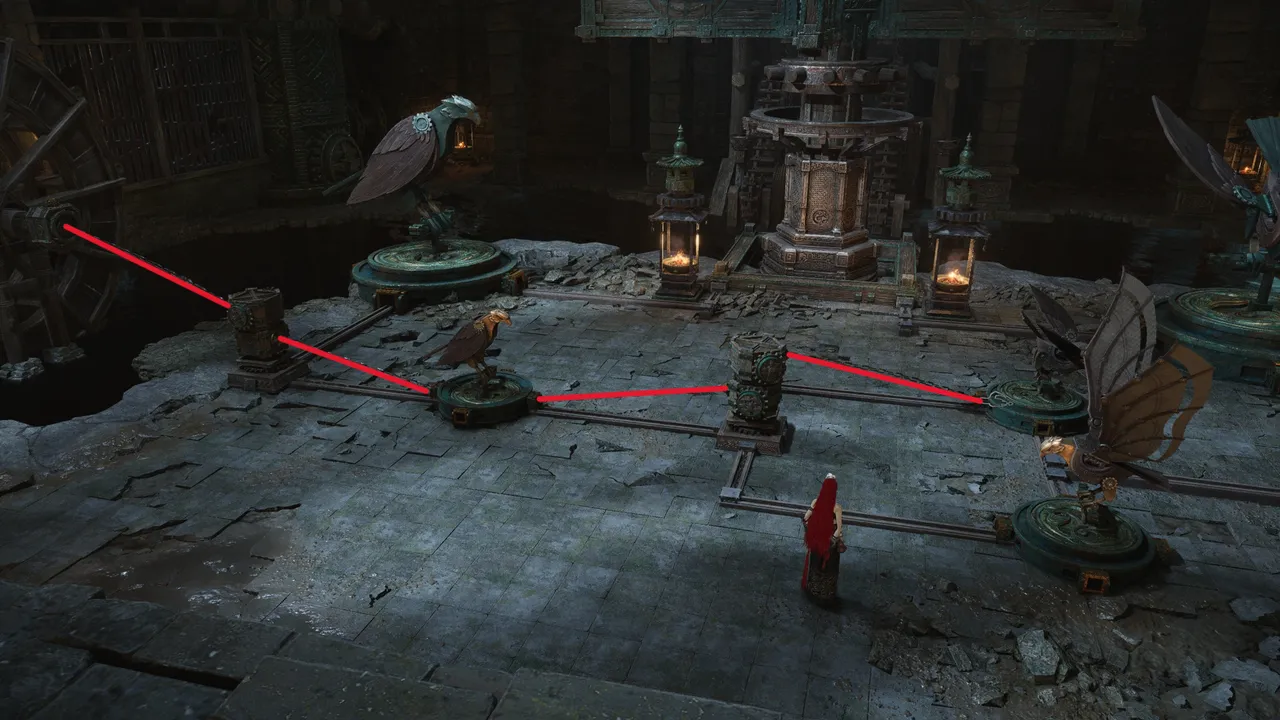
After solving the puzzle, go through the newly opened door on the right, explore the side rooms, then head outside and make your way across the rooftops of Old Mohist City to the next puzzle area.
Puzzle 3
This puzzle uses two waterwheels as power sources, one on either side of the locked door. For each side, connect a chain mechanism to its waterwheel, then use the mechanism's second chain to power the nearby bird statue. Once both birds are activated, the door unlocks.
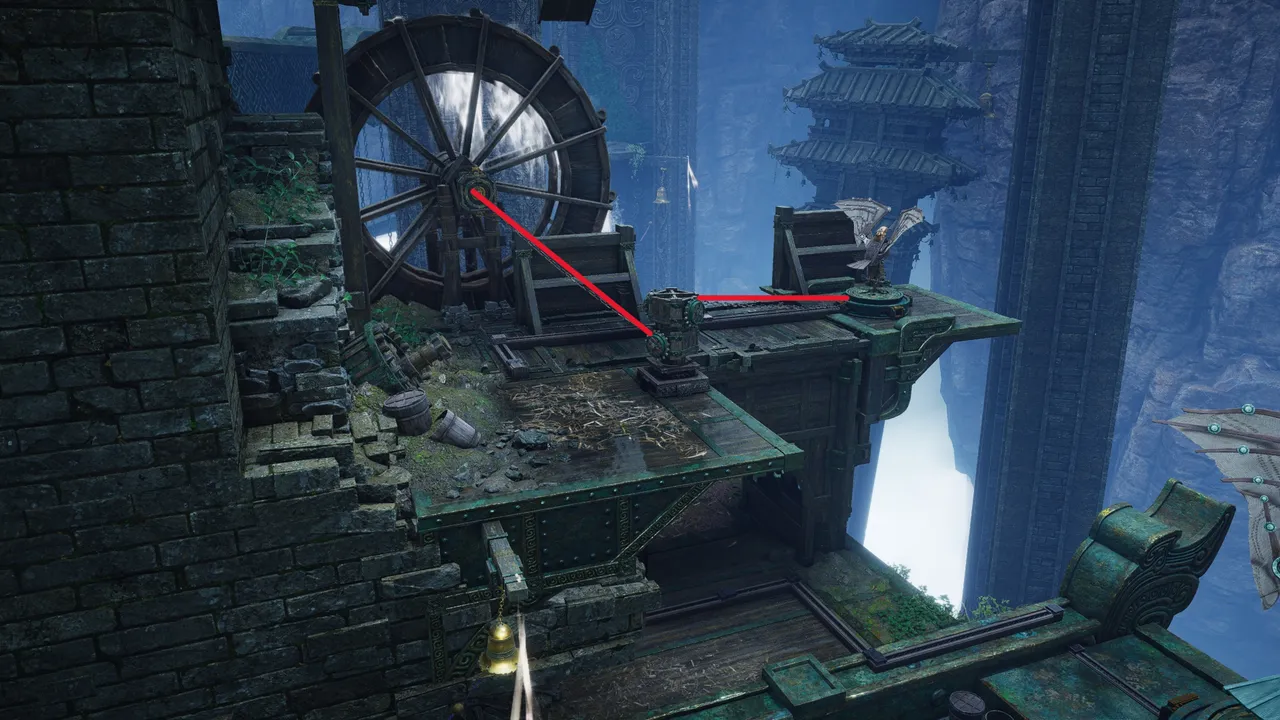
Pull the lever, cross the rooftops, watch the short cutscene and conversation with Chen, then enter the newly opened door on your right and take the zipline to the next puzzle.
Puzzle 4
This puzzle is slightly more "complex". Examine the two stationary bird statues to identify the required poses, then connect the room's chain mechanisms accordingly. The completed solution should look like the image below.
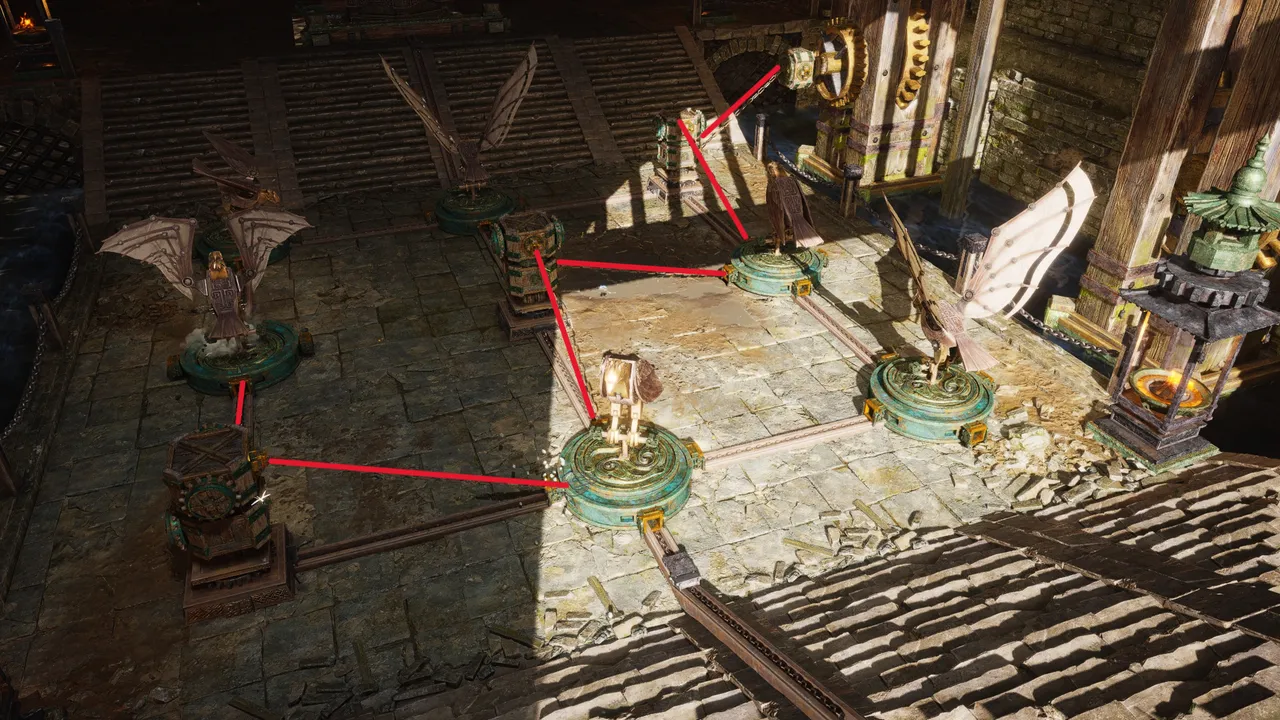
Puzzle 5
The final puzzle uses the same mechanics as before but across a larger circular platform. Rotate the platform counterclockwise twice, then connect the mechanical birds as shown below.
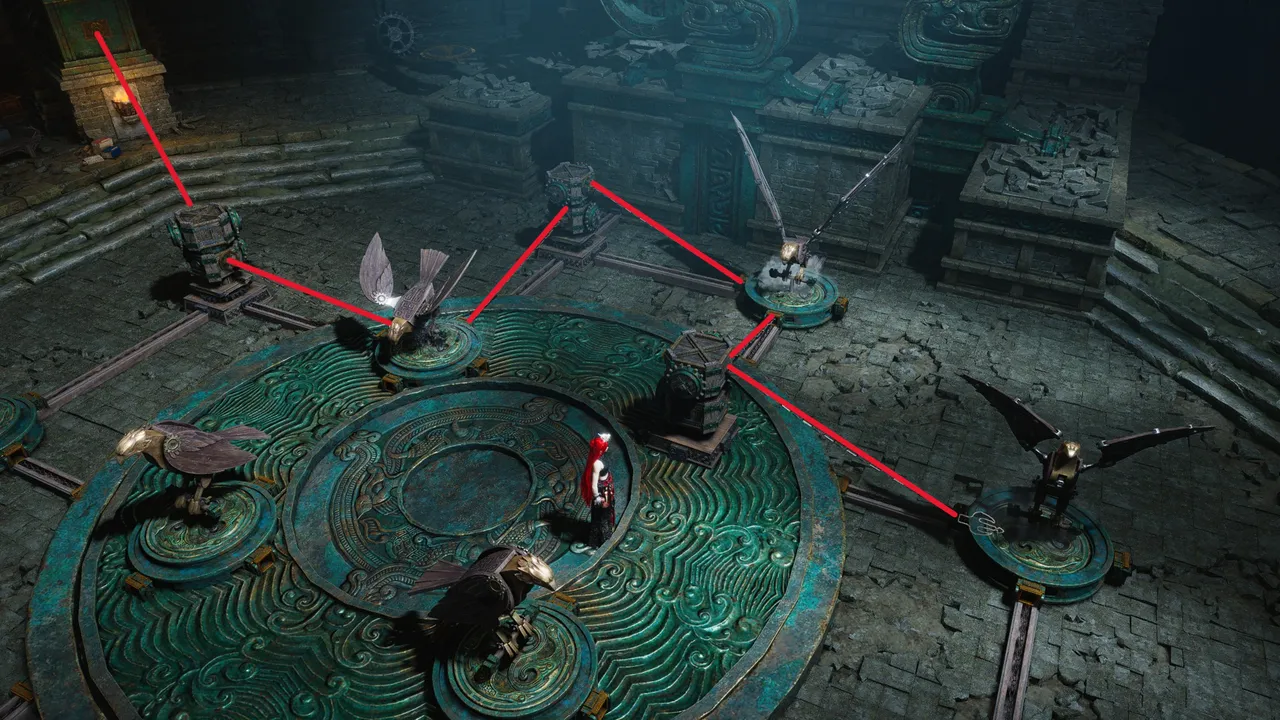
Once complete, stand in the centre of the platform to activate the lift, which takes you to the Mohist Hall. After the final cutscene, speak with Chen one last time, then strike the bell to complete the quest.