The default crosshair in Overwatch 2 does the trick, but a custom crosshair can give you an edge in battle. If you’re looking to change yours, read our Overwatch 2 crosshair guide. It has everything you need to know on how to change your crosshair on PlayStation, Xbox, & PC.
Changing your crosshair in Overwatch 2 on PC, PlayStation, or Xbox is as easy as it was in its prequel. However, if you are unaware of the process, here is a simple set of steps that you can follow:
- Start the game.
- Once you load into the main menu, press the Escape button. If you are on a PlayStation or Xbox, press the ‘Options‘ or ‘Menu‘ button on your respective controller.
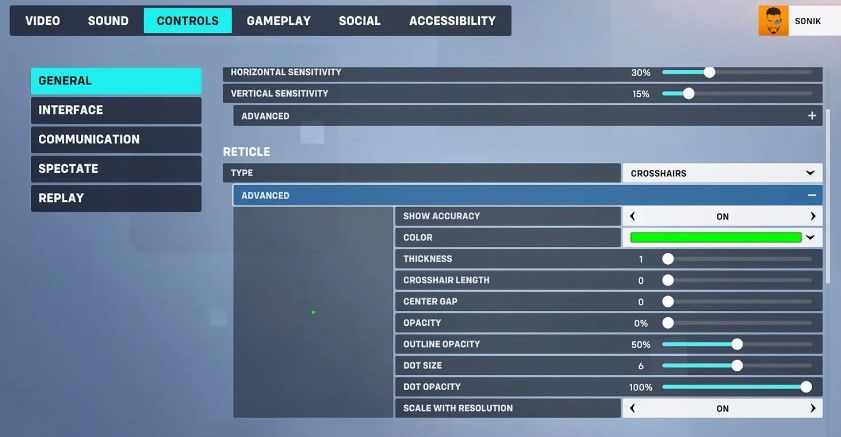
- From there, head over to the ‘Controls‘ tab.
- Under the ‘General’ settings, scroll down until you come across the ‘Reticle‘ option.
- From here, change its type from Default to either Circle/Crosshairs/Circle and Crosshairs/Dot.
- Expand the Advanced Reticle settings and you’ll come across multiple options to enhance your crosshair.
- Tweak its colors and utilize the sliders until you find a combination that works best for you.

If you’re new to the game or just unfamiliar with how the process works, here’s how you can change the crosshair in Overwatch 2.
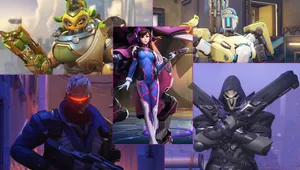
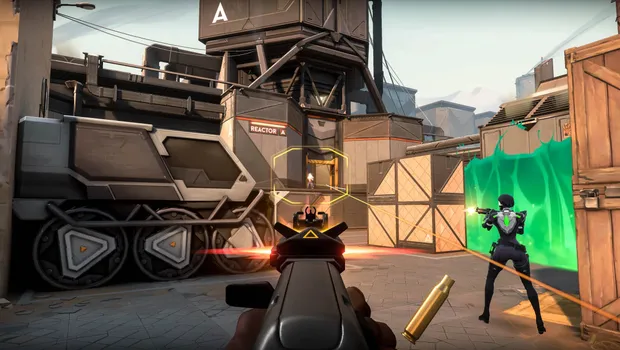
Here is a customized example of a modified crosshair that can give you an edge in fights.
Overwatch 2, just like its prequel, comes with a default white circular crosshair with a dot in the middle. While this default crosshair does the job, having a custom crosshair gives you an advantage over other players in certain situations.
Utilizing a custom crosshair can help you to land more accurate shots on opponents, and thereby help you to escort the payload, robot, or even capture sites much more easily.