Trending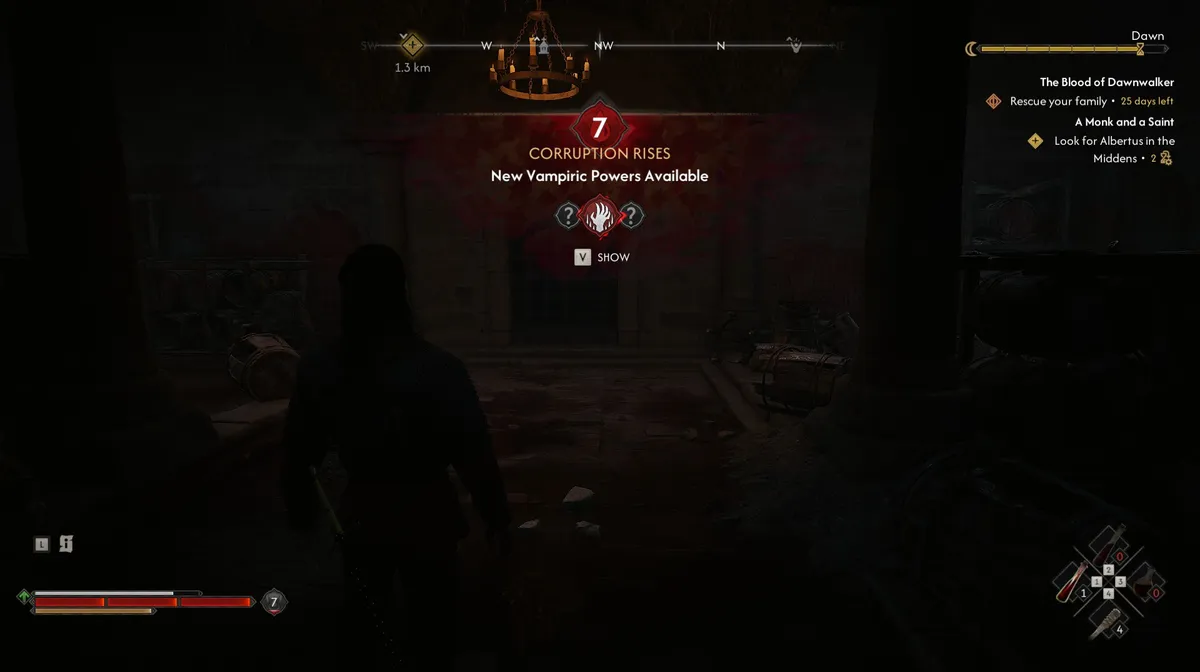
Coen levels up the same way most RPG protagonists do - killing enemies, finishing quests and progressing the story all feed the same XP bar, and every level grants a Skill Point to spend. What makes The Blood of Dawnwalker's levelling system worth a proper breakdown is everything sitting underneath that.
Character Level also determines which quests are safe to take on. The Journal marks tougher quests and enemies with a skull icon, scaled across three tiers: a plain skull for increased difficulty, an orange skull for hard-but-doable, and a red skull warning that a single mistake could cost you your life. These are relative to your current Level, so a quest showing a red skull now may drop to a safer tier once you've levelled up and built out your Perks.
Three Skill Trees
Every level grants one Skill Point, and the game points you towards the nearest Shrine to spend it. Shrines are dotted across Vale Sangora and marked on the map with a small church icon.
Interact with one and you get four options:
- Perks - spend Skill Points on Perks and Abilities
- Fast Travel - jump to any other Shrine you've discovered
- Storage - access your inventory
- Wait - advance the in-game clock
The Perks menu is where the actual build-crafting happens. Skill Points aren't spent into a single shared tree. Coen has three:
- Swordmastery - usable anytime, regardless of form
- Witchcraft - Human form only
- Vampirism - Vampire form only
The form restrictions matter for planning a build. Witchcraft Perks and Abilities only function in Human form, because the magical sigils that power them heal shut the moment Coen transforms. Vampirism runs the opposite way, with its Perks and Abilities locked to Vampire form. Swordmastery ignores the restriction entirely and stays available in both.
Perks vs Abilities
Each tree splits into two columns: Perks on one side, Abilities on the other.
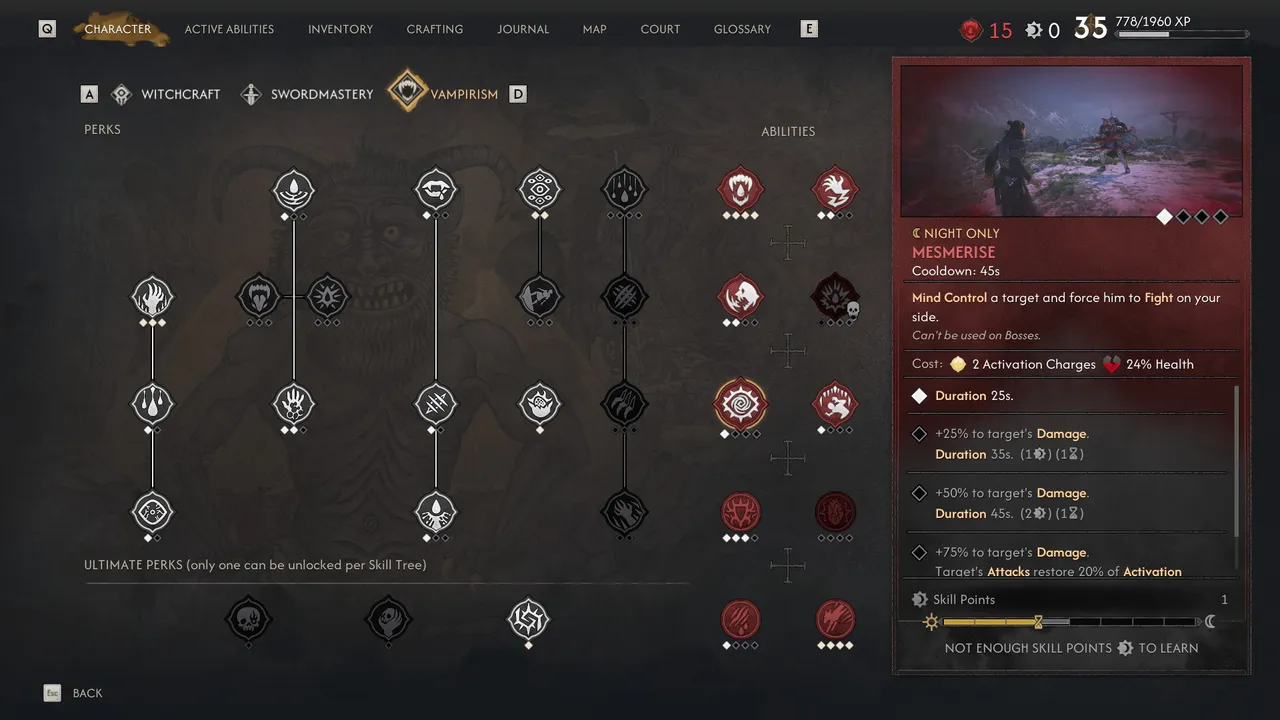
Abilities are the active moves you trigger manually in combat - Damage over Time, Lifesteal, Stuns, Health Regen, Mind Control, and more. A few work passively once learned, but even those still need to be equipped in the Active Abilities panel before they'll do anything.
Perks, by contrast, are all passive buffs: increased attack damage, extra carry weight, more Ability Slots, and similar stat bumps that apply automatically once unlocked.
Almost every Perk and Ability has multiple levels, and each level costs its own chunk of Skill Points. Once a level is actually unlocked - more on what that takes below - select the Perk / Ability and hold the confirm button to learn it.
Manuals Unlock the Advanced Tiers, and Most Also Cost Time
Some early Perks and Abilities unlock through story progression alone, but the bulk of Witchcraft's and Swordmastery's trees sit behind Manuals. You'll find these scattered around Vale Sangora or buy them from vendors, then read them from your Inventory to unlock whichever tier they're tied to. Any Perk or Ability locked behind a Manual carries a small book icon, so it's easy to spot at a glance which you can't touch yet.
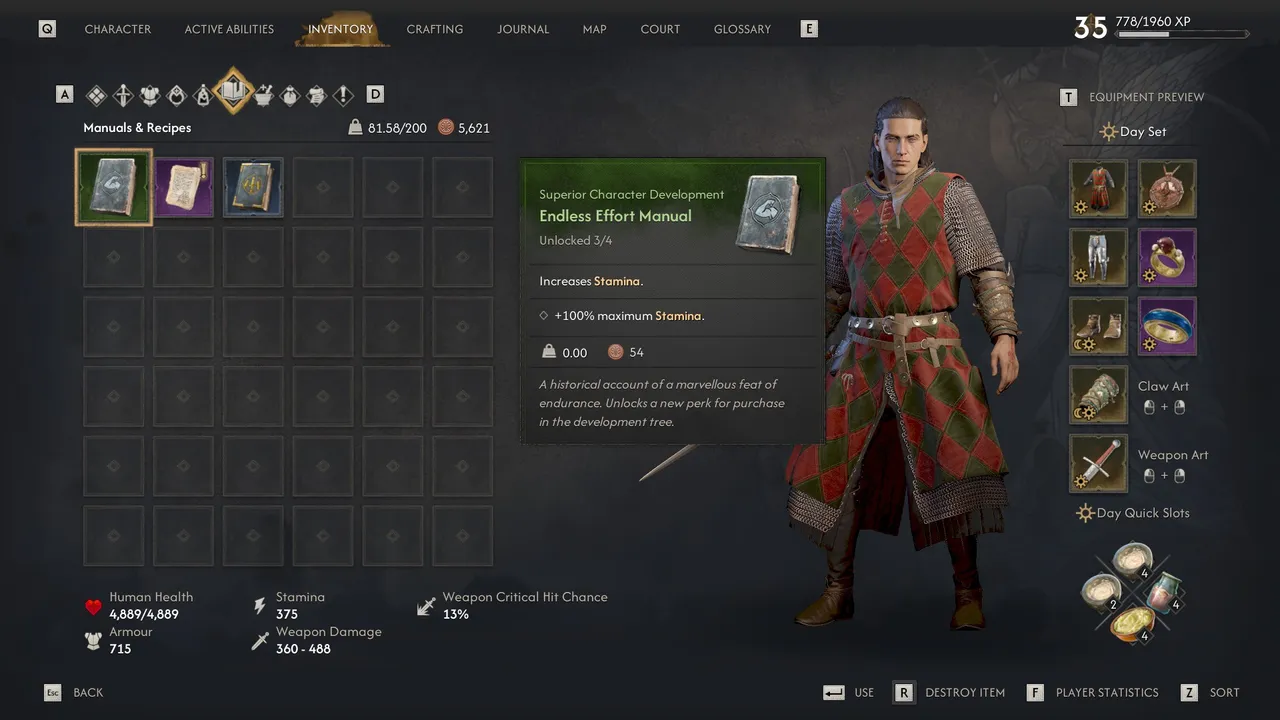
Without the Manual, that tier stays greyed out no matter how many Skill Points you've got sitting unspent. Grab Manuals the moment you find them regardless - you don't need to be ready to spend on the unlock straight away, just reading it from your Inventory is what makes the option available for later.
On top of that, most Perk levels cost more than Skill Points and Manuals, they cost Time. These are flagged with an hourglass icon in the Perk/Ability description panel, and learning one advances the in-game clock, which is a real cost given Coen is working against a countdown.
Vampirism Runs on Corruption, Not Manuals
Vampirism's Perks and Abilities are gated behind Corruption, which rises every time Coen drinks blood, but it comes in two distinct flavours. Regular Corruption builds from feeding on animal or human blood, marked with a fanged-mouth icon, while a separate track builds specifically from drinking Vrakhir blood, marked with a skull icon. Perks sit entirely behind the regular Corruption track, while Abilities can be gated behind either.

Each time Corruption rises, you'll get a "New Vampiric Powers Available" notification. If a Vampiric Perk or Ability won't unlock, more Skill Points won't fix it. You need to feed, and feed on the right source.
Same as with Witchcraft's and Swordmastery's trees, most Perks and Abilities in this tree also cost Time alongside Skill Points.
Ultimate Perks
Each tree ends in three Ultimate Perks at the bottom, but you can only unlock one. Getting there requires having spent a total of 35 Skill Points somewhere in that specific tree. The choice is permanent, and it's per tree, so Witchcraft, Swordmastery and Vampirism each have their own independent capstone to work towards.
Equipping Abilities
Unlocking an Ability at a Shrine doesn't make it usable, as you still need to equip it on the Abilities Wheel. Alternatively, you can also open the Active Abilities panel from your character menu, then assign it to a Quick Slot.
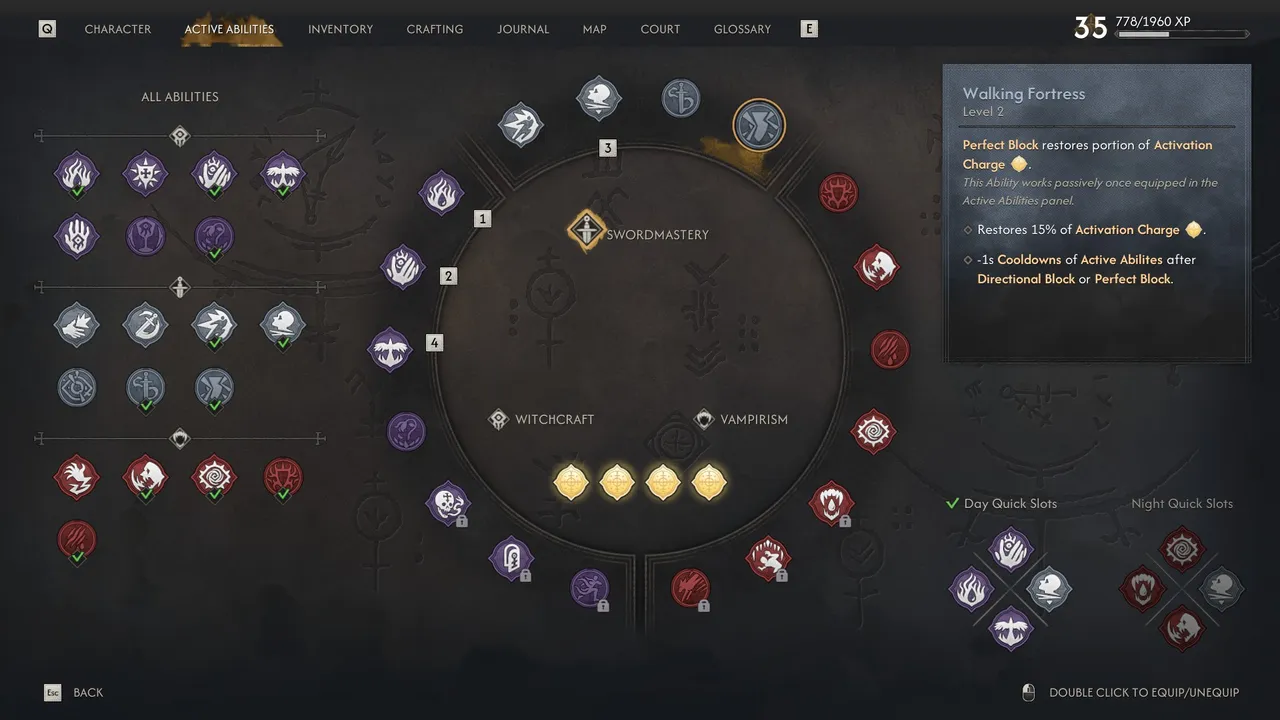
There are separate Day and Night loadouts here, matching Coen's Human and Vampire forms, so you can build a Witchcraft-and-Swordmastery kit for daytime and a Vampirism-and-Swordmastery kit for night without re-equipping every time he transforms.
The same Day/Night split extends to your wider equipment loadout too, including gear and consumables.
Quick tip: The three trees encourage specialising rather than forcing a fixed class. Witchcraft suits players leaning into Coen's human side and magic. Swordmastery is the safest all-round pick, since it works in both forms. Vampirism leans fully into the supernatural side, with progression tied to feeding rather than exploration. It's worth deciding early what type of a build you're chasing, since that choice shapes how you spend Skill Points from the start.
DON'T MISS!