Out of the three activities in Jormag Rising, The Ox's Yoke will prove to be the most challenging if you are a player that excels in areas other than reflexes. Thankfully, it's not something that would require a pro with amazing mechanics to pull off so pretty much everyone can still get the gold medal here as well. Here are a few tips and a video walkthrough that should help you get the adventure done as efficiently as possible.
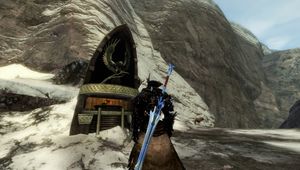
White balls of energy that the Ox sends your way will knock you down and bring your score down. Evade them at any cost and ideally don't get hit all. Your first risky part is the tiny bridge at the very start, with the where the big red ball that counts for three points.
A knockback ball will come your way from the opposing direction so it's best if you start crossing the bridge just as a ball reaches it on the other side. This way you can know whether it will move through the middle of the bridge, slightly to the left or slightly to the right. You can pick a different lane and move past it easily that way.
As soon as you cross the bridge, turn left and collect the red balls for easy points. As you return back to the track, check your left side for any oncoming white balls and cross to the other side to collect the remainder of your points.
Hug the right wall and keep collecting points but try to save your enhanced jump for when you dive below for the three-pointer. I used the jump earlier and lost roughly 2.5 seconds because I couldn't get back on track from the ledge in the video below. The timer is pretty forgiving so it didn't cost me much there.
As you get back, you will need to cross the lane once more so keep your eyes on the right side to avoid potential knockbacks and point loss. When you collect the points, move forward to the bridge and cross it at any given time but keep your eyes up front and switch lanes to dodge oncoming balls. Spamming the speed ability on cooldown will help you get around this part easier.
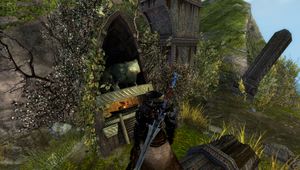
When you cross the second bridge, take a right and move to collect the points by slightly backtracking. You will need the enhanced jump here. Be mindful of the oncoming knockbacks - using left click to rotate the camera while moving or jumping can be invaluable here. Collect the points, hug the wall and move forward.
You will reach a plateau with a lot of points around here and you can collect them in any order. My advice would be to let the oncoming balls dictate your direction. They have three lanes - left, right and middle. Whichever lane the first ball is going towards, just pick the other two first. If it's rolling down the middle, it doesn't matter whether you go left or right. When it comes to cleaning sides, you should be safe as long as you hug the wall.
Pop a speed buff and cross the final bridge, which once again has three lanes. If you see a ball speeding towards you, remember to dodge. The Ox shield is a waste of time in my opinion so avoid using that.
If you collected all the points and didn't get knocked down by following the path I described above, you should be at 45 points by the time you cross the last bridge. The good news is that there are seven points on this platform in total, the bad news is that this is where knockback balls spawn so you don't get much telegraphy to dodge them.
It might be best to pick the first two points up and then steer slightly left to the lower ledge of the platform. When you collect those points, you will be at 49 out of 50 so just use the super jump to collect the closest point on the upper ledge and take that gold medal home. I approached this slightly different in the video but that path is slightly riskier.
Additionally, here are a few tips that will be useful across the entire run:
- Just as you start the activity on the shrine, you will need to turn left by 90 to 95 degrees. While it seems trivial, this can save you a second or two, which can be essential in the run if you are being especially careful about the incoming balls of energy
- You can still dodge, using your regular endurance bar. Daredevils might have a better time abusing the mechanics than other professions
- Ox shield immobilises you so try to avoid using it
- Try to have your speed buff up whenever you're about to start crossing a bridge
- If you got confused by the wall of text above, there is a video walkthrough below