Now, you're likely to acquire many, if not all of these items by simply following The Falconeer's singleplayer campaign, but if your mind is as chaotic as mine and likes to veer away from the stuff you oughta do - you'll surely appreciate this guide.
So, we specifically focused on cities, items and permits that The Falconeer players will have access from the get-go. The goal is to provide you with the optimum spots to make money and spend money, be it on weapons, mutagens, or items.
So, we start with the obvious one.
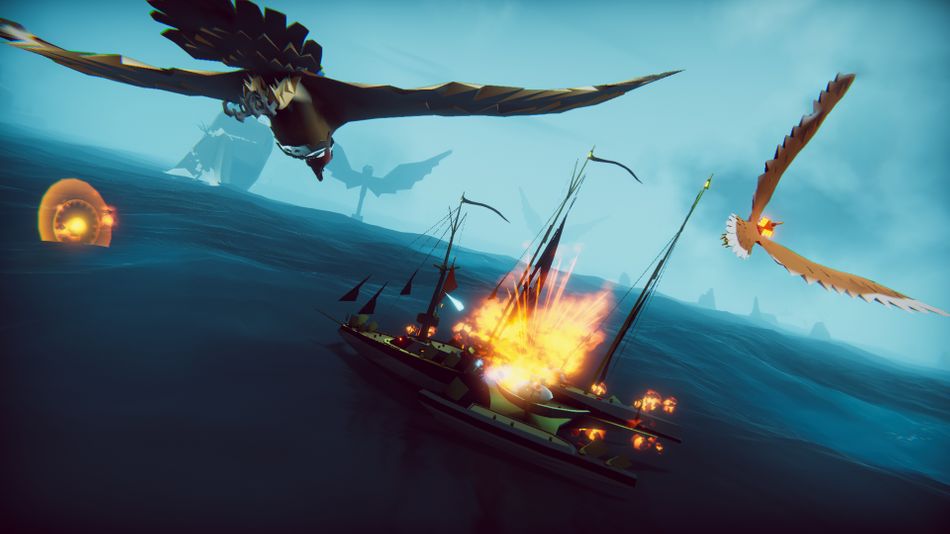
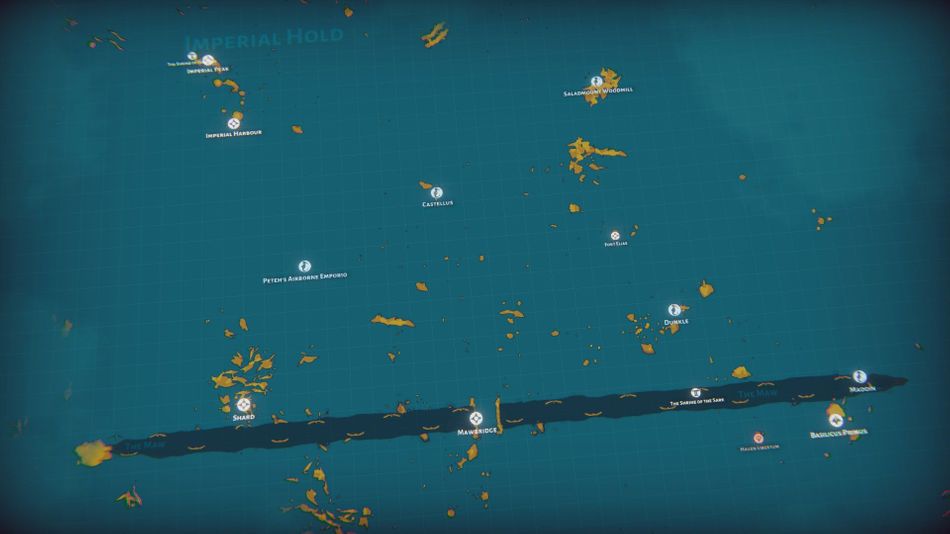
DUNKLE
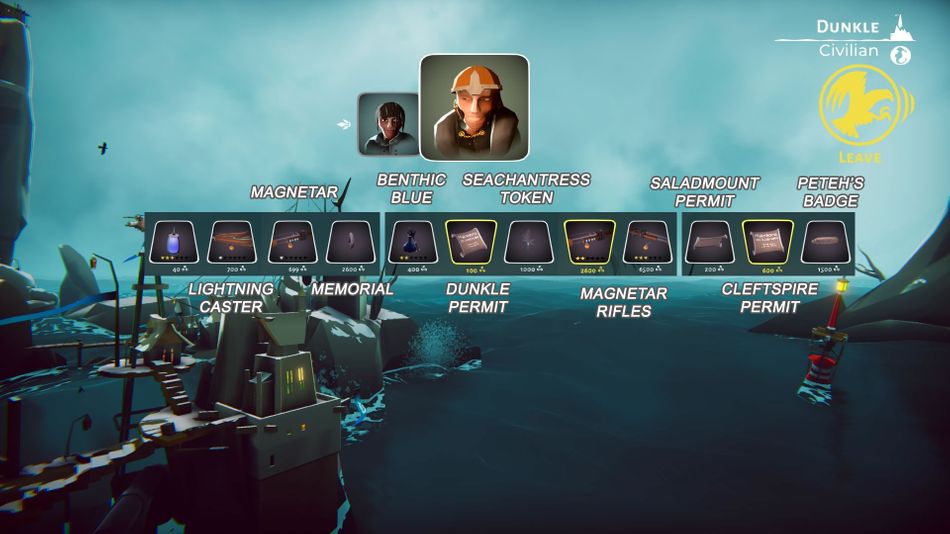
Dunkle will initially serve as your base of operations, and this should be your platform for acquiring Magnetar Rifle as soon as possible. You don't want prolonged spray and pray conflicts - you want to get in quick, bring the pain and get out even quicker, and Magnetar's lower rate of fire but higher damage is built for it. Plus it will carry you pretty much to the end.
Instead of rarity, The Falconeer's weapons come with stars signifying what shape they're in, but one or two-star Magnetars have been more than enough for most encounters we've had.
PERMITS AND WRITS
The Imperial Embassy

The Imperial Embassy is a great place to get all the bureaucratic aspects of The Falconeer in order. Need a permit? They've got you covered.
Writ of the Bounty Hunter should be one of your priorities, as Imperial bounties tend to be the most lucrative ones. Anything with "Imperial" in it should be prioritised - they've got most of the good stuff - but Imperial bounties will quickly get you the cash you need to become the bane of The Ursee's seas.
Northgate
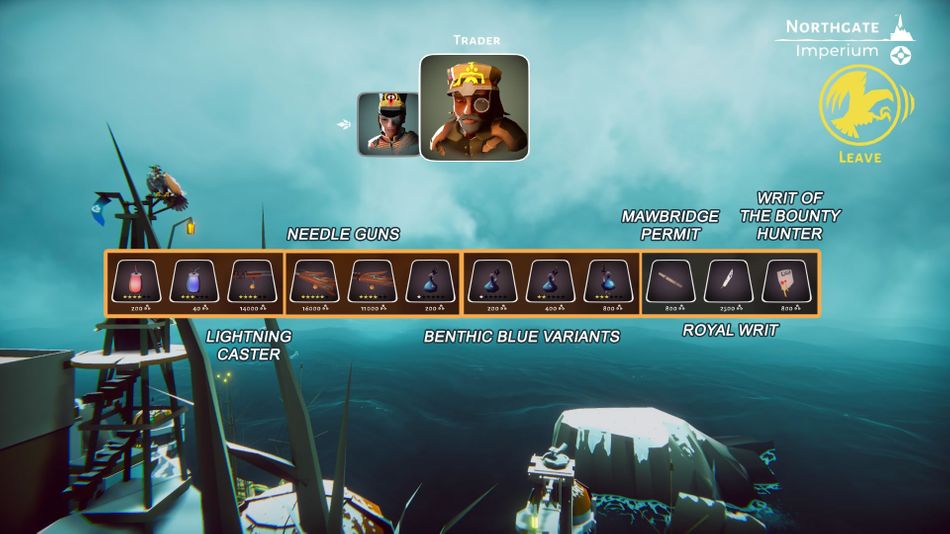
Northgate also has the Writ of the Bounty Hunter, as well s the Royal Writ, which grants you access to the Imperial Palace. Decently priced mutagens should come in handy in the early game too.
LUCRATIVE BOUNTIES
Imperial Harbour
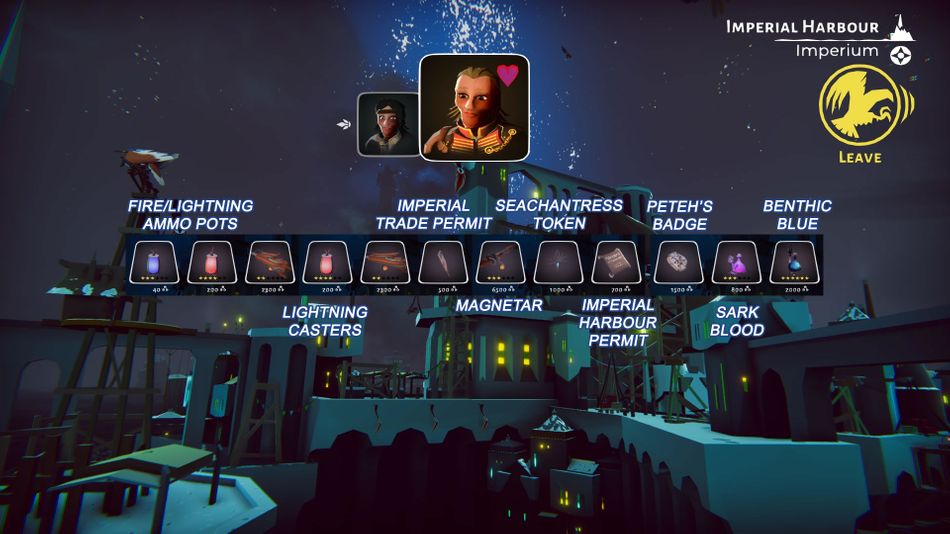
Once you've got the Writ of the Bounty Hunter and hopefully the Imperial Harbour's trading permit, you'll be loving this place. With probably the highest paying bounties for much of the game, racking up cash will be as easy as you're skilful.
My personal favourite is the defence of the harbour, as it doesn't send you anywhere - defend, survive and pick up the cash to invest into your bird, guns or magical voodoo trinkets.
Caldera Prison

Caldera Prison is also a high-paying bounty location so get that permit as soon as possible. You can get a Sublime Magnetar Rifle here for when you've accumulated enough dough, and boy do you want this one. Trust us when we say it's worth it - the increased rate of fire makes short work of enemies. Blast away!
MUTAGENS AND MAGICAL ITEMS
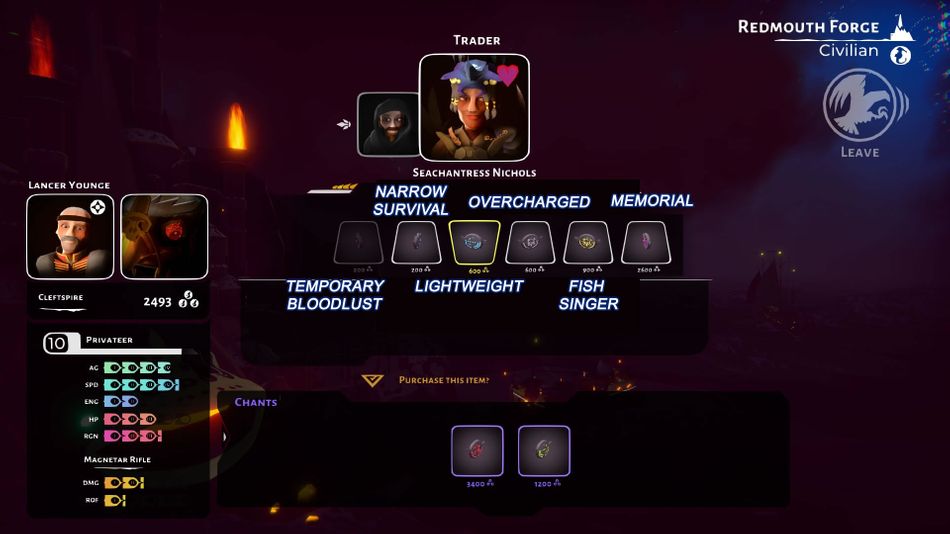
Sacred Steps
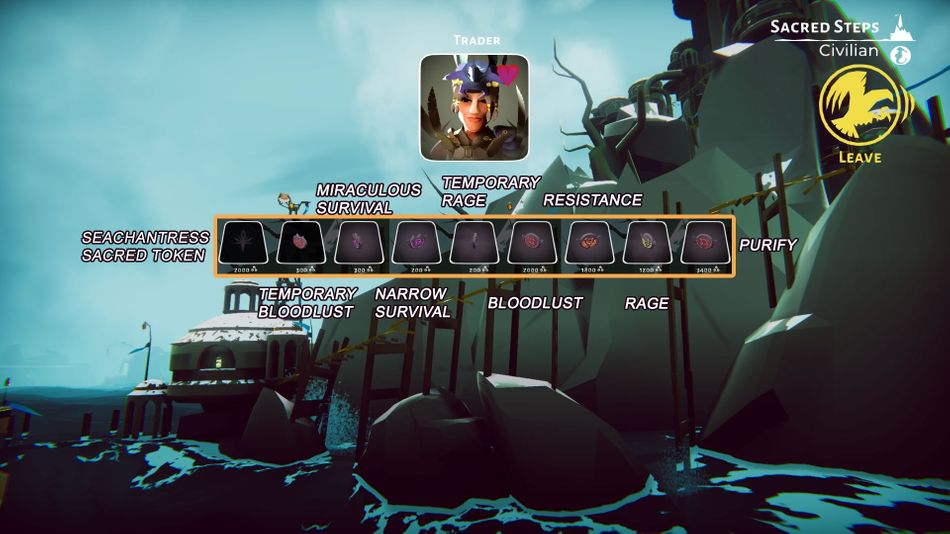
Located in the northern part of the map, Sacred Steps is a very useful stop to make, as it has temporary and permanent solutions to beefing up your bird. There are no bounties to be had here, just the magic, and while it's certainly pricey - it's well worth it and attainable if you heed the advice above.
- Purify - Increases chance of critical hits on vessel sub-components
- Rage - Gain energy boost each time you kill airborne enemies
- Resistance - Ammo pots no longer overcharge in storms
- Bloodlust - Get a health boost each time you kill a flying enemy
- Temporary Rage - One-time Rage effect
- Narrow Survival - Get a 50 per cent health regen when your health runs out, one-time effect
- Miraculous Survival - Get a 100 per cent health regen when your health runs out, one time effect
- Temporary Bloodlust - One-time Bloodlust effect
- Seachantress sacred token
Biochemist Kytera
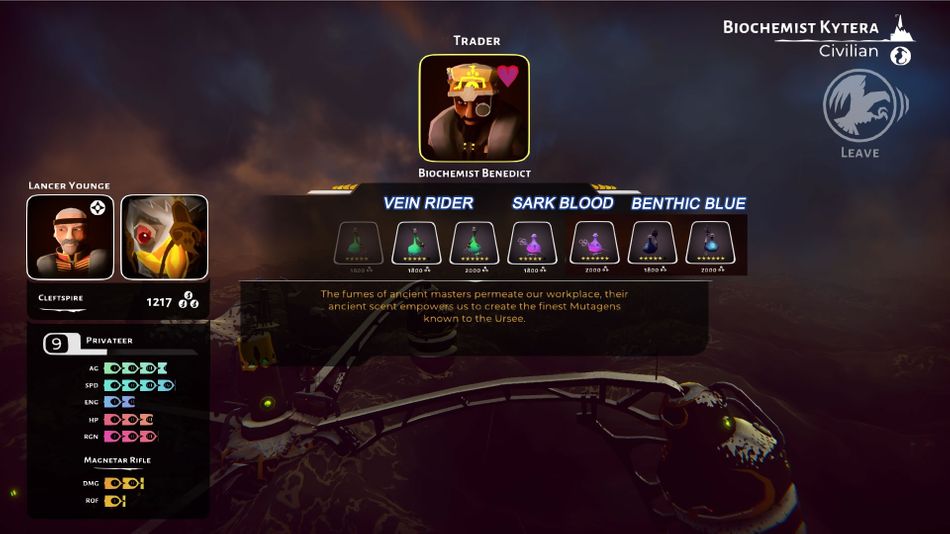
Biochemist Kytera won't exactly be your first stop in The Falconeer, which should be clear from the saucy prices and the quality of the mutagens, but it will eventually be your go-to place for making your bird unstoppable. It offers the following.
- Benthic Blue - Improves your bird's metabolic rate, increasing its speed
- Sark's Blood - Stimulates your bird's adrenal glands, granting higher agility
- Vein Rider - Improves your bird's regeneration speed
REDMOUTH FORGE
There are some bounties to be had at the Redmouth Forge, but they're not very lucrative. This is the place you want to go for magical items, and most of them are well worth it:
- Memorial - Increases the range of Splinter collecting
- Fish Singer - Fish heals you more
- Overcharged - Your ammo pots fill up quicker
- Lightweight - Jetstreams propel you along faster
- Temporary Rage - One-time Rage effect
- Narrow Survival - Heal 50 per cent instead of dying
- Miraculous Survival - Heal 100 per cent instead of dying
- Temporary Bloodlust - One-time Bloodlust effect
OTHER NOTABLE SPOTS
Cleftspire

Cleftspire will serve as your second base of operations and it's got some decent bounties, as well as an assortment of goods and mutagens. The latter are modestly priced due to their Light quality, but they'll get the job done until you've got enough cash to spare.
Castellus
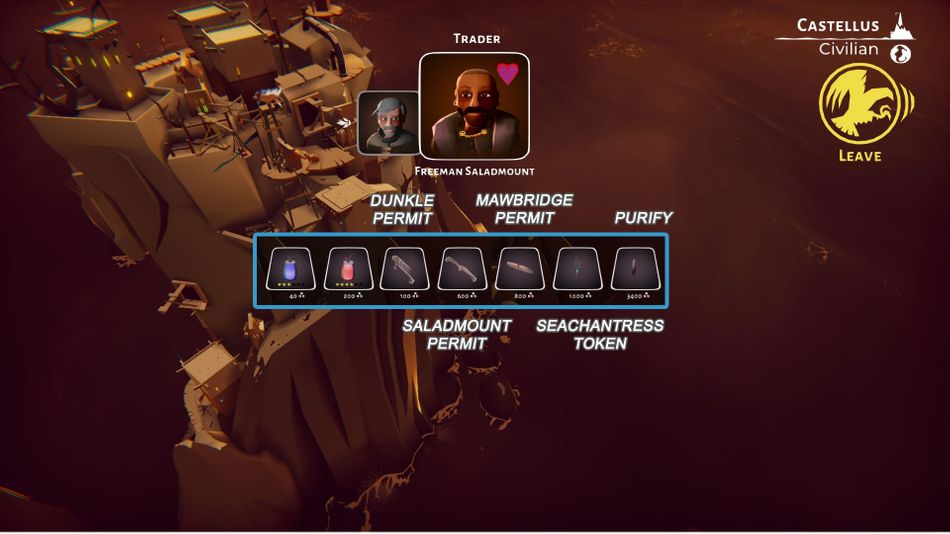
Castellus has some decent bounties and a nicely varied assortment of goods. Nothing to write home about, but its location makes it a frequent stop. Plus it's beautiful, but what part of The Falconeer isn't?
Peteh's Airborne Emporio
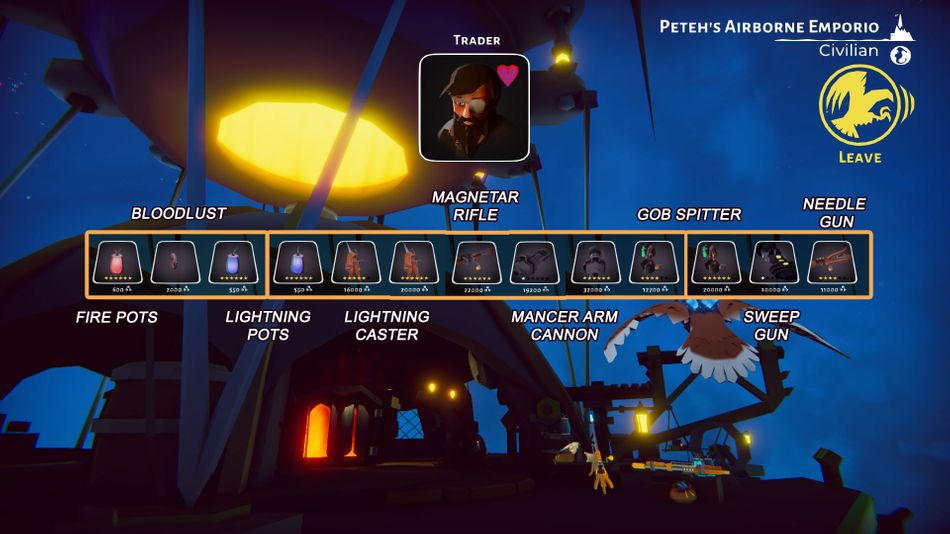
Easily the most magical place in The Falconeer, what with it just hanging there in the sky, Peteh's Airborne Emporio is a good stop for hefty firepower. It's got something for everyone, although some items clearly cost a pretty penny. They're worth it though.
Shard

Shard has some quality Ammo Pots and the Imperial Trade Permit, as well as a decently priced Magnetar Rifle, which will come in handy in the early game. A few bounties should make sure you can afford it so go and hit that Imperial Harbour.