Lorestangirs serve as one of two types of collectables in Senua's Saga: Hellblade 2, the latest action adventure from Ninja Theory and Xbox Game Studios, which will reward you with the achievement called "Tales of Midgard."
There are 18 of those lorestangirs scattered throughout the game, and given that the design of Senua's Saga: Hellblade 2 is mainly linear, each of them is semi-missable. They are semi-missable because you can miss them inside one level if, for example, you drop a ledge which cannot be climbed back. You can always replay a given level, but if some of the lorestangirs are located at the end of the level, you'll have to play through the entire level to reach it again.
In this guide, we will uncover the locations of each of the 18 lorestangirs, along with explanations on how to reach them and how not to miss any of them.

All Lorestangir Locations
1. This one is unmissable and will be discovered during the tutorial in the game's first level.
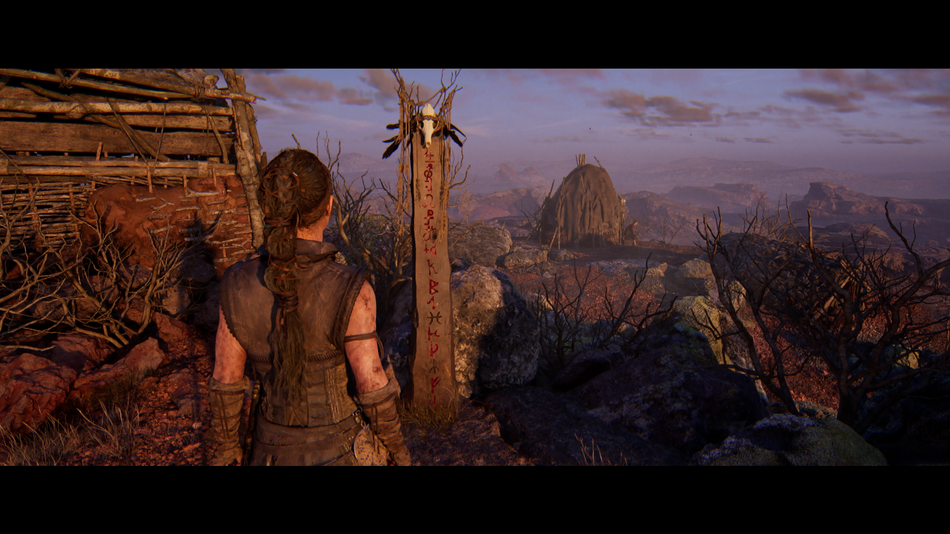
2. At the beginning of the second chapter, behind the huts to the right. As the level begins, look to the right, and you'll see it behind a hut.
3. After the cutscene where Senua receives her mirror,. When she returns to reality, enter the big building and pass through it (the building with a hanging corpse). After you exit this building, take a left path and enter the large area. On the left is a passage you can crawl under. The lorestangir is through here.
4. Inside the draugar village, during the sneaking sequence. Right after you shimmy over the cliff, continue a bit forward and look to the left; you'll see a ladder there. You'll know you're on the right path if Senua stops sneaking. Climb the ladder and continue forward. At the end of this path is the next lorestangir.
5. At the beginning of the third chapter, after saving Fargrímr, get past the broken bridge and soon you'll come to a fork. Take the left path and follow it to the end. The lorestangir stands right above the abandoned settlement you visited earlier.
6. After freeing Thórgestr, the trio will descend a small hill and reach a burndown settlement. When you reach a marker stick, turn left. Past the burned house, the next lorestangir is located just to the right after you pass the house.
7. Inside the settlement, from where you set out on the task to find Hiddenfolk, you'll see the next lorestangir located in front of the house on the hill, just to the right of where Fargrímr is sitting. To reach this house, you must go behind Fargrímr's position and take the path to the left.
8. After solving the first Hiddenfolk's test, continue forward until you reach an arch stone you must walk under to progress further. Instead of going through there, turn around and notice the climbable ledge just opposite of the arch stone. The next lorestangir is at the end of this path.
9. After the second test, continue on until you reach the area where you must pass between the two shallow, small ponds. Just after you pass through here, take a left and pass through a crack between two stones. The next lorestangir is at the end of this path.
10. After the above-mentioned ponds, do not turn left, but instead continue a bit forward and go through the arch to the right. You'll find the next lorestangir after you pass under the arch.
11. This one is a bit tricky to notice. During the lake puzzle, look in the opposite direction of the last offering. This lorestangir is the only one set upside down. Go to the ledge and press focus to grab it.
12. Upon entering the Hiddenfolk cave, drop down the several ledges until you drop to a small, shallow pond. Turn to the right and notice a shield resting against a cave wall. To the left of the shield is passage you can take. This passage will lead you to the next lorestangir.

13. After solving the first puzzle where your torch is extinguished by the water, continue on following a blue shadow. After crawling through some tunnels, you'll notice the lorestangir on your right. Drop down the ledge to reach it.
14. Inside the cave, where you come across floating stones for the first time, continue on and drop down to the area where the voices will tell Senua that this is the final test. The lorestangir is inside the small cave, exactly opposite the final test area.
15. At the beginning of the fifth chapter, Thórgestr and Fargrímr will mysteriously disappear. Continue on until you reach a small waterfall just down a small hill (the location of one of the faces). Go up the hill from the waterfall and take the path to the right. At the end of this path, downstream from a bigger waterfall, is the next lorestangir.
16. After Senua asks Ástríðr about her mother, jump over the stone here and enter the bigger area. Take a path to the right and continue on, passing under the stone arch. At the end of this path stands the next lorestangir.
17. Before entering the second Hiddenfolk hideout, you'll have to solve one of their puzzles. The third and farthest rune you'll have to activate will be located all the way to the right, just under the cliff you came into this area from. To solve this puzzle, you must activate water-drop-like devices to switch realities. One such device is located just above the water. Opposite of it is a blue mist that turns to a stone once you activate it. Do not activate this drop but instead, go through the mist and pass through a crack between rocks. Continue on all the way to the end of this path, where you'll find the next lorestangir.
18. Before entering Ástríðr's hut in her village, look to the left, and you'll notice too high ledge to climb. Backtrack a bit and take the path to the left, and you'll reach a courtyard and the house there—this house is in the highest position in the whole village. The last lorestangir is located to the left of this house.
And there you have it. These are all the 18 lorestangirs you'll have to find in order to unlock the "Tales of Midgard" achievement. After you find all of them, you'll unlock Druth as the narrator too, and inside the main menu, in the extras section, you will be able to listen to all of the stories together. Just scroll to the Lorestangir Stories, sit back, and enjoy Druth's stories for as long as you like.

DON'T MISS!