Poppy Playtime: Chapter 5 continues with very intricate puzzles as the very backbone of its gameplay. This horror from Mob Entertainment does a very good job when it comes to puzzle creation, and each one of them is almost certain to give you a hard time while trying to solve it.
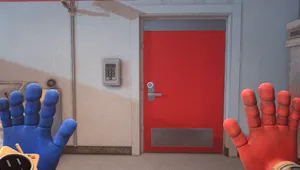
During the mission called Testing, you'll find yourself inside the toy testing facility, where the main objective will be to leave the area by finding the correct door code, and to do that, you'll need to find three different discs and insert them into three disc slots.
If this puzzle is giving you a headache, we've prepared a guide that will explain everything regarding it, step-by-step, with separate guides on how to find each disc.
Disc no. 1
Finding the first disc is very easy, and it doesn't require any puzzle-solving skills, only good perception. However, this disc can easily be overlooked and can pose a serious problem to find if you don't know where to look.
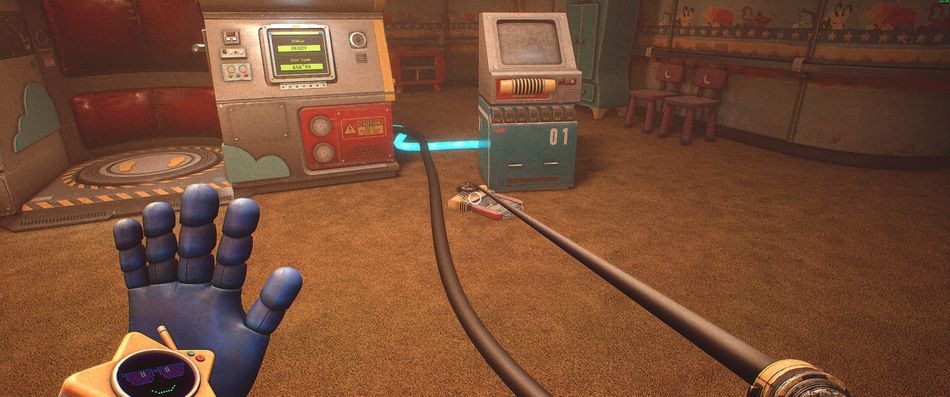
The first disc is actually located on the floor, just in front of the central machine. Pick it up with one of your hands and insert it into any of the slots.
Disc no. 2
The second disc, however, cannot be located that easily. To find it, backtrack a bit from the central room, and you'll come to the room with two elevators. Next to the elevators, there are some stacked crates you can get past by shimmying next to them. Do that, then use the blue hand to unlock the door ahead of you.
Once inside the next area, you'll notice many mostly inaccessible doors. To be more precise, there are six of them: three on one side and three on the opposite side of the area. Look for the door with the yellow light above it, and open it; this is the middle door on one of the sides.
Inside this room, you'll see the electricity source you can imbue your glove with, so go ahead and do that. Once you have the electricity, open the next door with the yellow light above it and transfer the electricity to the device located above the door. Once you do that, you'll be able to watch a short commercial, so go ahead and watch it if you want.
Keep transferring the electricity to each room using the same strategy. The opposite rooms are farther away, so make sure to sprint to them to maintain the electricity in your glove. Once you open all the doors and activate the electricity in them, the last room will feature the fire source instead of the electricity one.
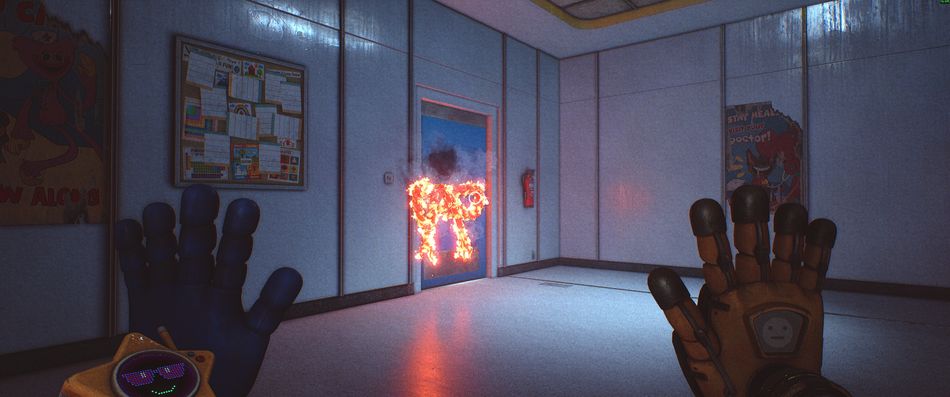
Now, imbue the glove with fire, run upstairs, and burn the ribbon on the door. Enter the newly unlocked room, and pick up the second disc located on the desk. Return to the main room and insert the disc into one of the slots.
Disc no. 3
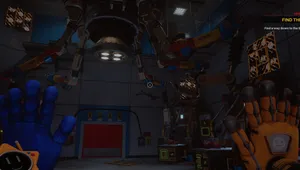
The third disc is located inside the area opposite the elevators. Enter this area through the blue door, and you'll find yourself inside a bigger, open area. Go to the opposite side of the blue door to find another blue door locked with the scanner that can be unlocked with the blue glove.
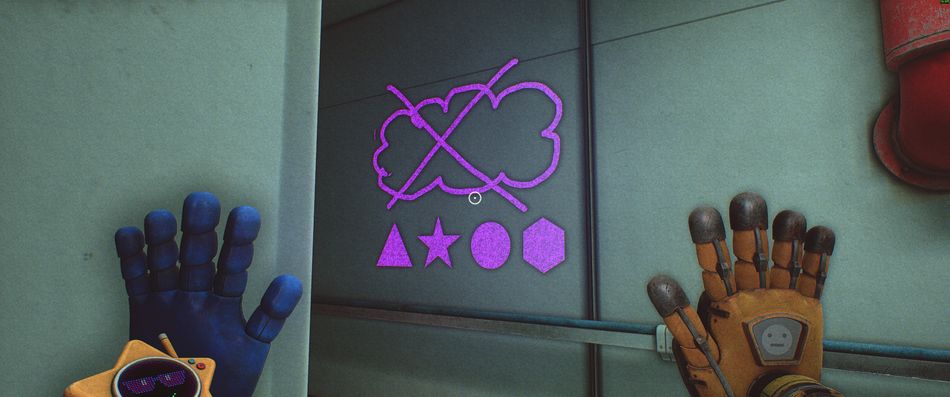
Once you enter the next room, go upstairs and employ the black light lamp. Keep going up until you reach the hallway on the right side, with some debris preventing you from going further. On the right wall in this hallway is a sign combination discoverable only under black light.
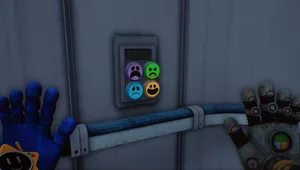
This combination showcases four different symbols: triangle, star, circle, and hexagon, and in this exact order. To solve this puzzle, you'll need to close four valves on this level. They are easy to spot, and two of them are located upstairs, while the remaining two are downstairs.
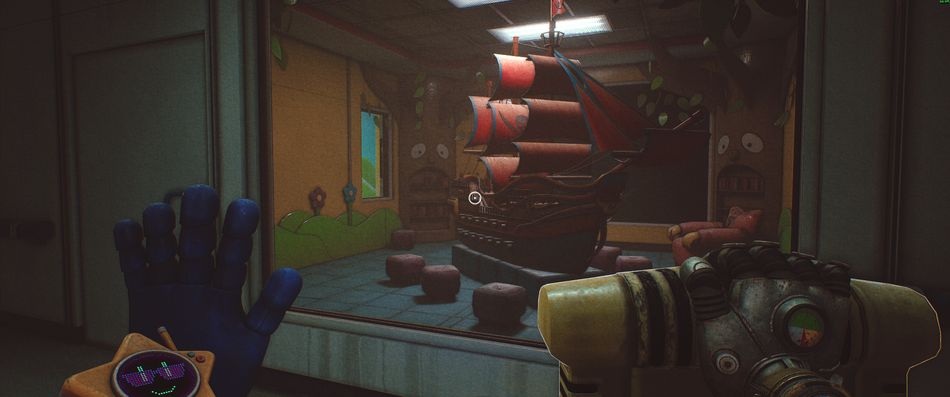
Close them in the order shown above, and you'll direct the gas to the lamp in the second room to the left, upstairs. First, you'll see the room with a big pirate ship. Get past this room and enter the next room. To the right, next to the window, is a gas lamp. Open the valve next to it and exit this room.
As you exit this room, look to the right, and you'll see a half-open double door. Look through this door, and you'll notice the other door you can open with an extended hand. Do it, and it will reveal the fire source. Now, use the conductive hand to imbue it with fire and run back to light the gas lamp.
The lamp will explode and crack the nearby window. Now use the pressurised hand to break this window and jump through it. This will let you enter the room with the pirate ship. Behind the ship is the third disc. Take it, bring it to the central room, and insert it into the slot. This will conclude the disc part of this puzzle.
Discovering the Door Code
This part of the puzzle isn't exactly the puzzle; it's only doing what you're supposed to do, but since the game doesn't hold your hand at all, you can definitely get lost and not know what to do here.
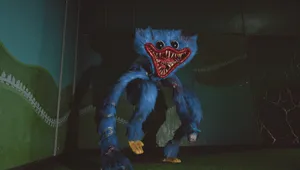
To discover the code, once all three discs are in place, you'll need to discover three different memories, where two of them are small minigames performed by Huggy Wuggy, while the third is just the cutscene. Enter the central machine and pull the lever; this will trigger the first memory, where you'll need to insert different shapes once they appear on the screen. This is quite easy, and once you do it and Huggy shows the first signs of anger, you'll finish the first memory.
Enter the machine again, and this time, you'll do a small dancing game with other toys. Once the second anger outburst happens, you'll end the second session. Notice that with each session, a part of the code is revealed on the machine's screen.
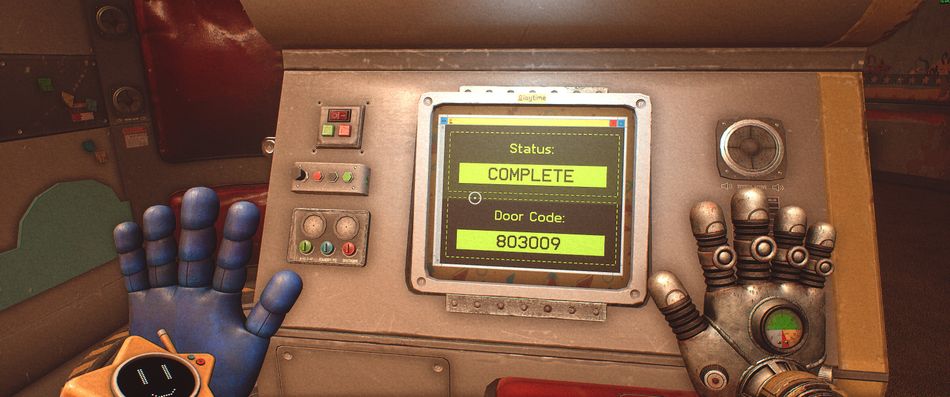
The third memory will bring you to the room where a scientist will experiment on Huggy Wuggy. Here, you'll have to unplug the cords that are keeping you still and break the screen. Once you try breaking the window, the scientist will secure it with a shutter. Pull the shutter up, break the window by hitting it at the cracked spot, and proceed to chase the scientist. This will conclude the third memory and reveal the full key.
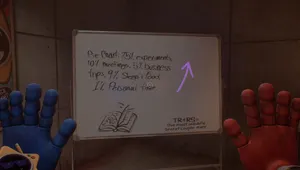
The key for the door is 803009. Now, we're not sure whether you can enter this code immediately and skip all those steps; if you want, you can try. However, it is better to do it as it is supposed to be done to experience the entire thing properly.

DON'T MISS!